A Short Guide to Sprue Removal and Miniature Assembly
- Nov 25, 2023
- 3 min read
 A sprue with a bunch of Chaos Space Marines waiting for assembly.
Whether you collect Warhammer 40K, Warhammer: Age of Sigma, D&D, or Star Wars Legion miniatures, if they are plastic, the parts are likely still attached to a sprue. Of course, this frame must be removed before we can begin the assembly. But is there a universal formula to streamline this process without getting parts glued to our fingers, lost pieces, or incorrectly assembled models? No, probably not. But at least there are a few methods that make this process easier.
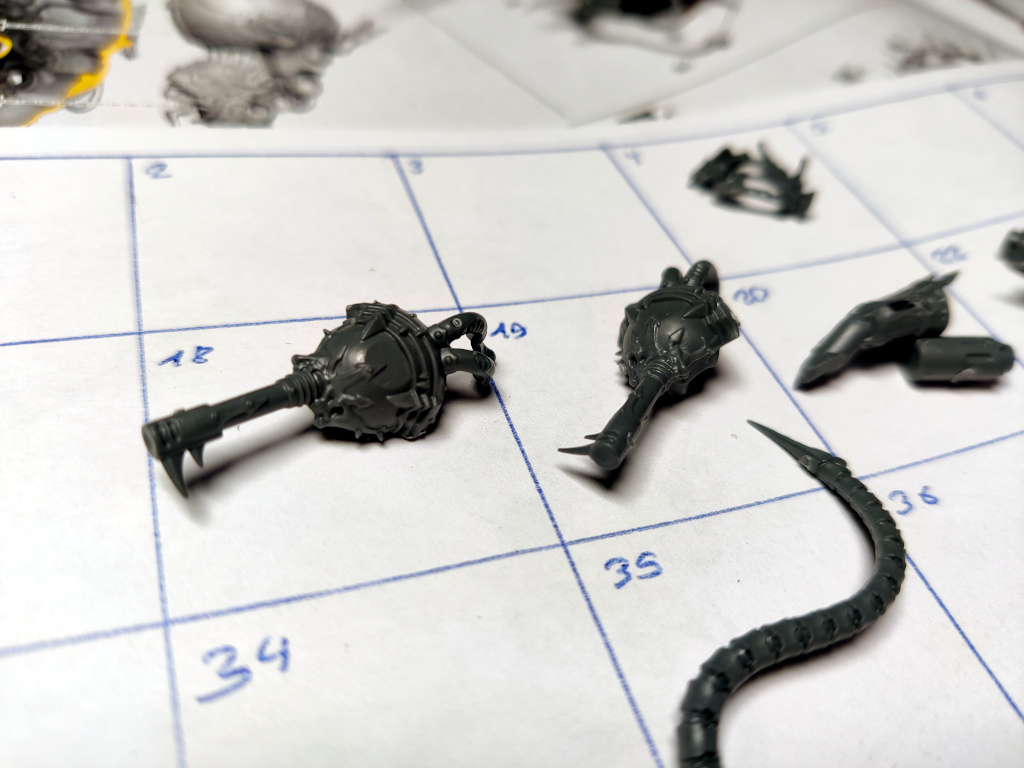 A grid to rule them all.
The order of assembly. No matter if the models are small or large or if you face a whole Spacemarine army, the manufacturers provide a certain order for the assembly. Sometimes manufacturers give the hobbyist some options, such as which weapon the Minifigure should carry. However, some parts only fit in a certain way with certain other parts. It is precisely these parts that require strict adherence to the sequence. In practice, we cut out one part, glue it to the plastic lump, switch the tool and repeat the process until the sprue is empty or our motivation is exhausted. The frequent tool changes are frustrating, at least to me. That's why I stick to the following procedure to minimize switching between superglue and flush cutter. First, prepare a large sheet of paper and draw a big grid on it. The grid cells are then numbered. The size of the grid depends on the number of parts of the model you want to assemble. For example, if you choose a 16x12 grid, your model can have up to 192 parts. Now you can cut out each part and place it in the cell of the grid that has the matching number. That's it! Once you have each part removed from the sprue, proceed to the finishing steps. Finally, you can put all the parts together without losing track of the correct order.
Minimizing post-processing steps. Once we have filled the grid with plastic parts, we need to perform some post-processing steps, which can also take some time. Therefore, we need to make sure we minimize the steps. This starts with separating the parts correctly from the frame. Cut the sprue as close to the model as possible. This can be easily achieved with the right tool. If you can't get close enough, leave some material so the sprue doesn't break by accident. Once the model part is freed, you can cut off the remaining plastic in such places. Now is also a good time to remove mold lines. Inspect each part and search for thin plastic lines. Take an Exacto knife and carefully scrape away the line. Believe me, this will improve your miniatures by quite a bit, as these lines tend to catch paint and get visible.
I hope this gives you some ideas on how to improve your miniature assembly process. Happy assembling!
Continue Reading
Color Alchemy: Mastering the Intricacies of Paint Mixing and Color Matching
- Nov 25, 2023
- 1 min read
Mixing paint to match a specific color can prove to be a difficult and daunting task due to the complexities arising from pigment variations and environmental factors. The differing hues, intensities, and transparencies of paints from various brands require a solid understanding of color theory ...
Choosing the Right Tool for Sprue Removal
- Nov 25, 2023
- 2 min read
Flush cutters are an important part of painting more beautiful miniatures than you might think. Especially if you do not want to spend hours cleaning up and filling in gaps...